Payment Link
This feature enables business owners who do not own websites receive single or recurring payments from their customers.
We have two types of Payment Links:
- Single Charge- a payment link where you can receive one time payments from customers
- Subscription Link - a payment link where you can create a charge cycle, and when a customer agrees and pays, their card is debited at the agreed number of times and interval. This is very useful for subscription based payments.
The payment link can be published or unpublished. It is published at creation.
Single Charge
Create Payment Link
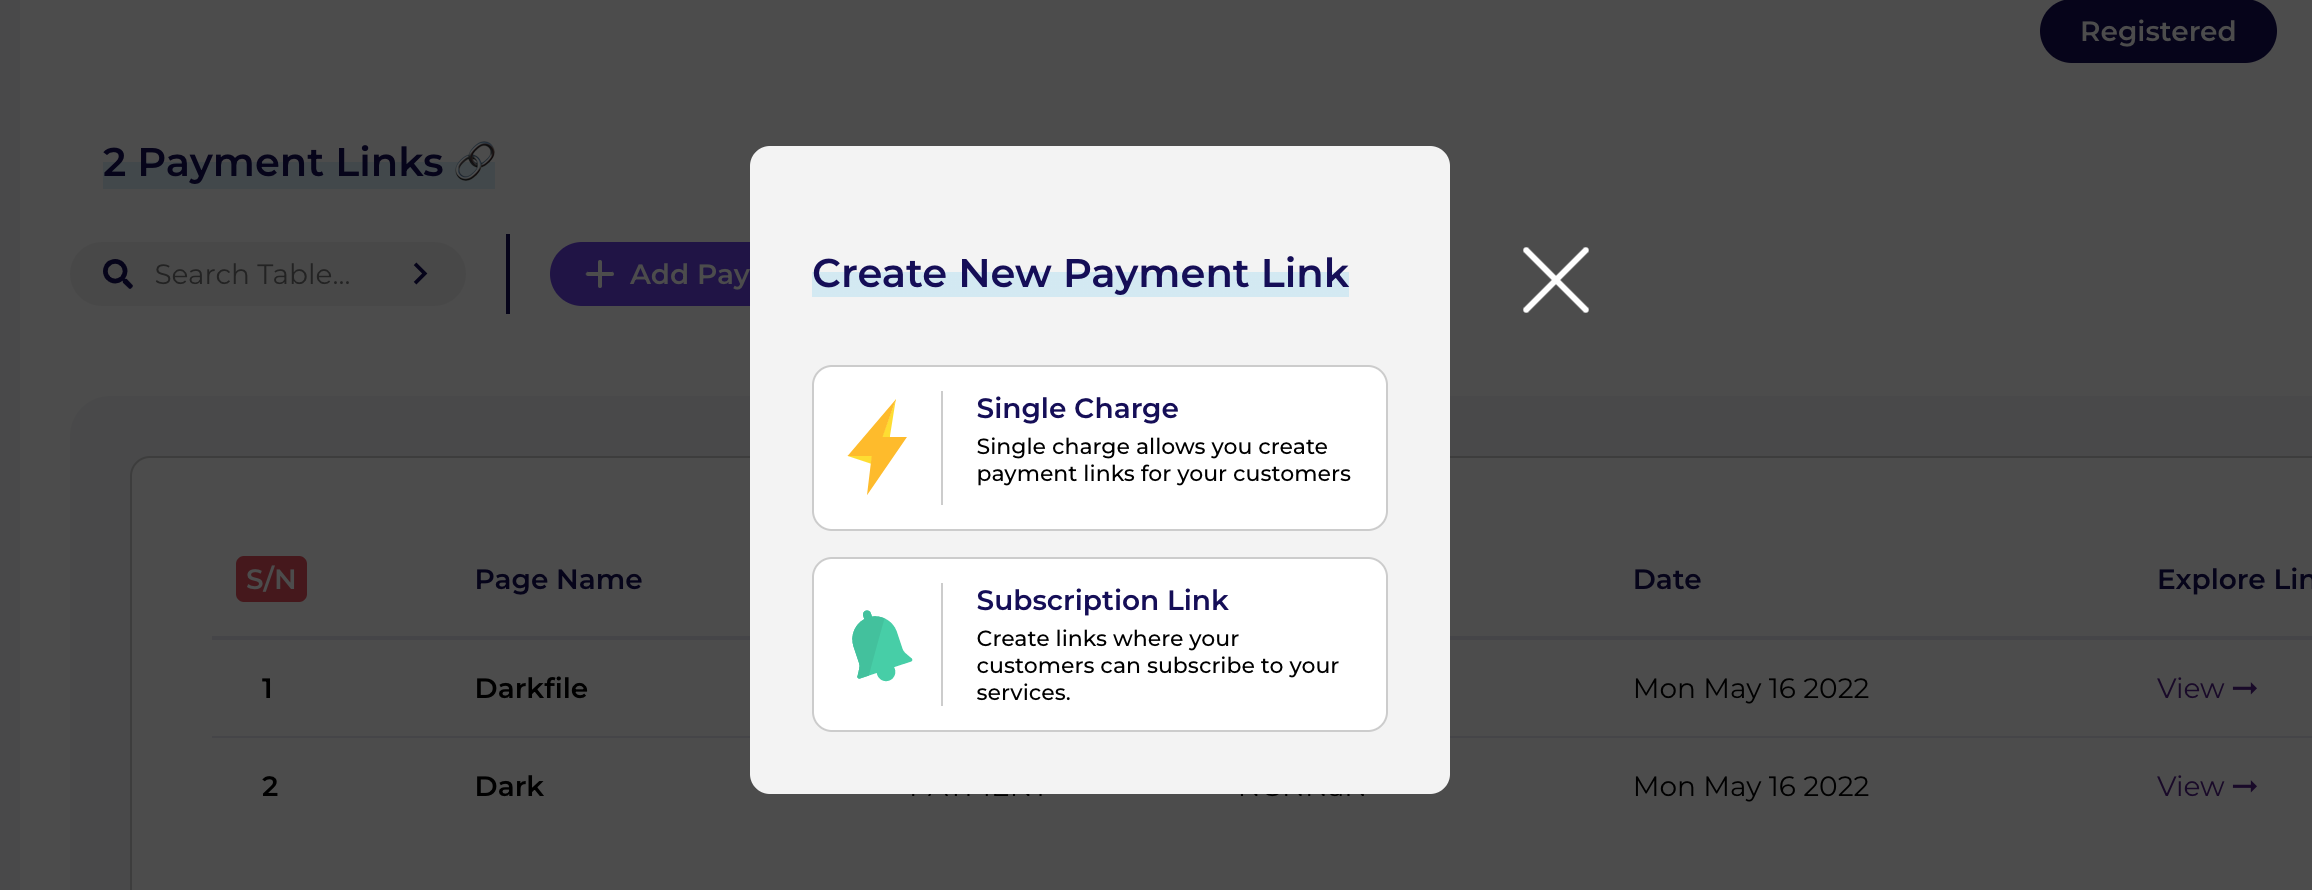
Fig 1.0
Single Payment Link
You can create a fixed amount when creating a payment link, so that whenever a customer tries to pay you, they can only pay you the exact amount. This is useful for scenarios where you're creating a link that is tied to a product, an invoice, or generally trying to collect payments for customers that must be equal to a particular amount.
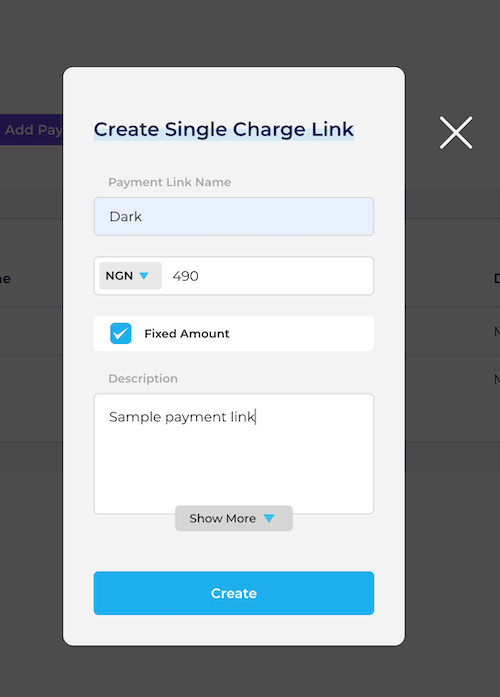
Fig 1.1
We also support dynamic amount options when creating your payment link. Whenever a customer tries to pay you, they can specify the amount they are paying. It is essential for scenarios where you're creating a link for donation.
Payment Link Details
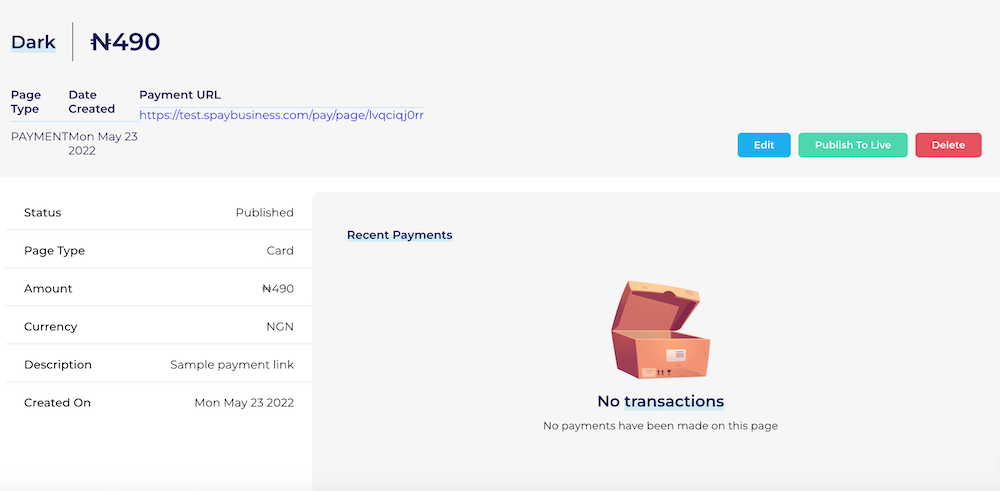
Fig 1.2
Edit Payment Link
Merchant can edit a payment link to reflect a new amount or change from a fixed amount to a dynamic amount. You can also publish or unpublished a payment link at will.
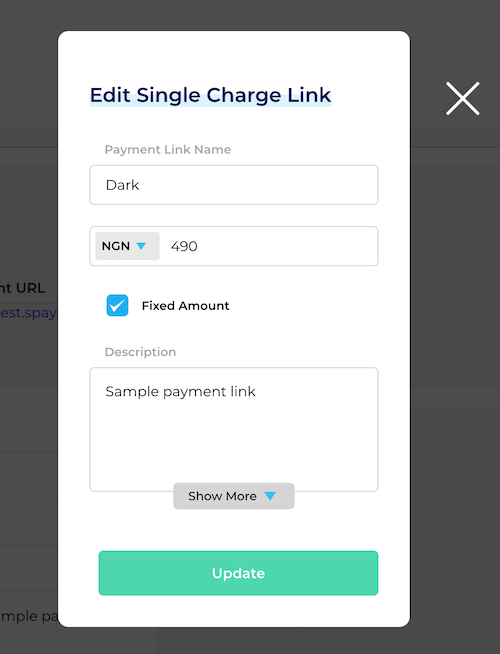
Fig 1.3
Delete Payment Link
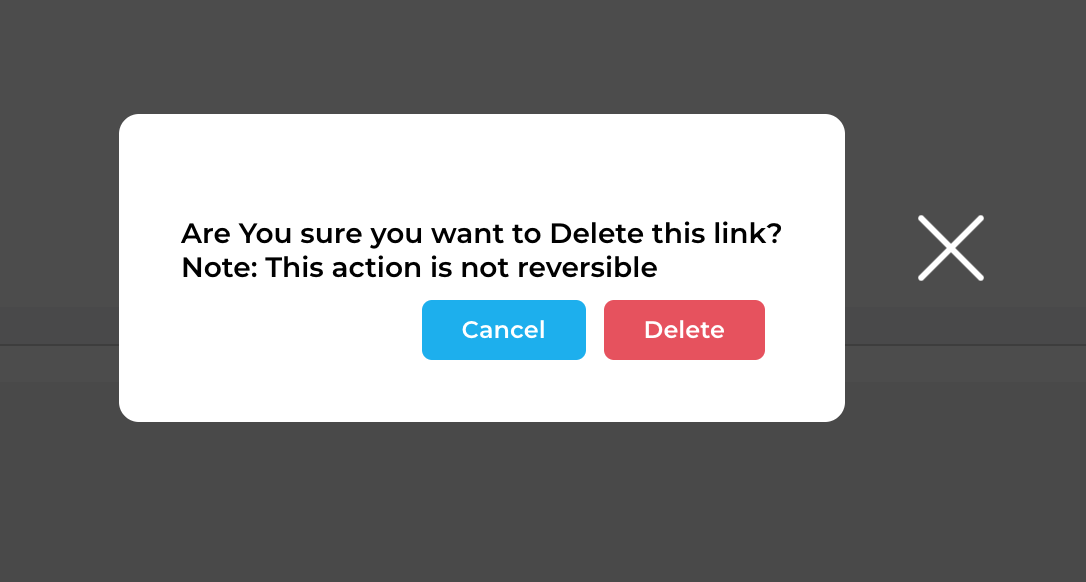
Fig 1.4
Subscription Link
To create a subscription link that your customers can use to subscribe, you have to do the following:
- Create a plan
- Create a subscription link.
Create a plan
Plan is the starting point for creating a subscription. This is what tells our system how much you are billing the customer, how often you want the billing to be, the duration to bill the customer and when the billing should commence.
To create a plan, visit spay plan route and follow the steps below:
View Plans
When you visit the plan route on the spay dashboard, you will see plans that you have created. If you have not created a plan, you will see an empty page
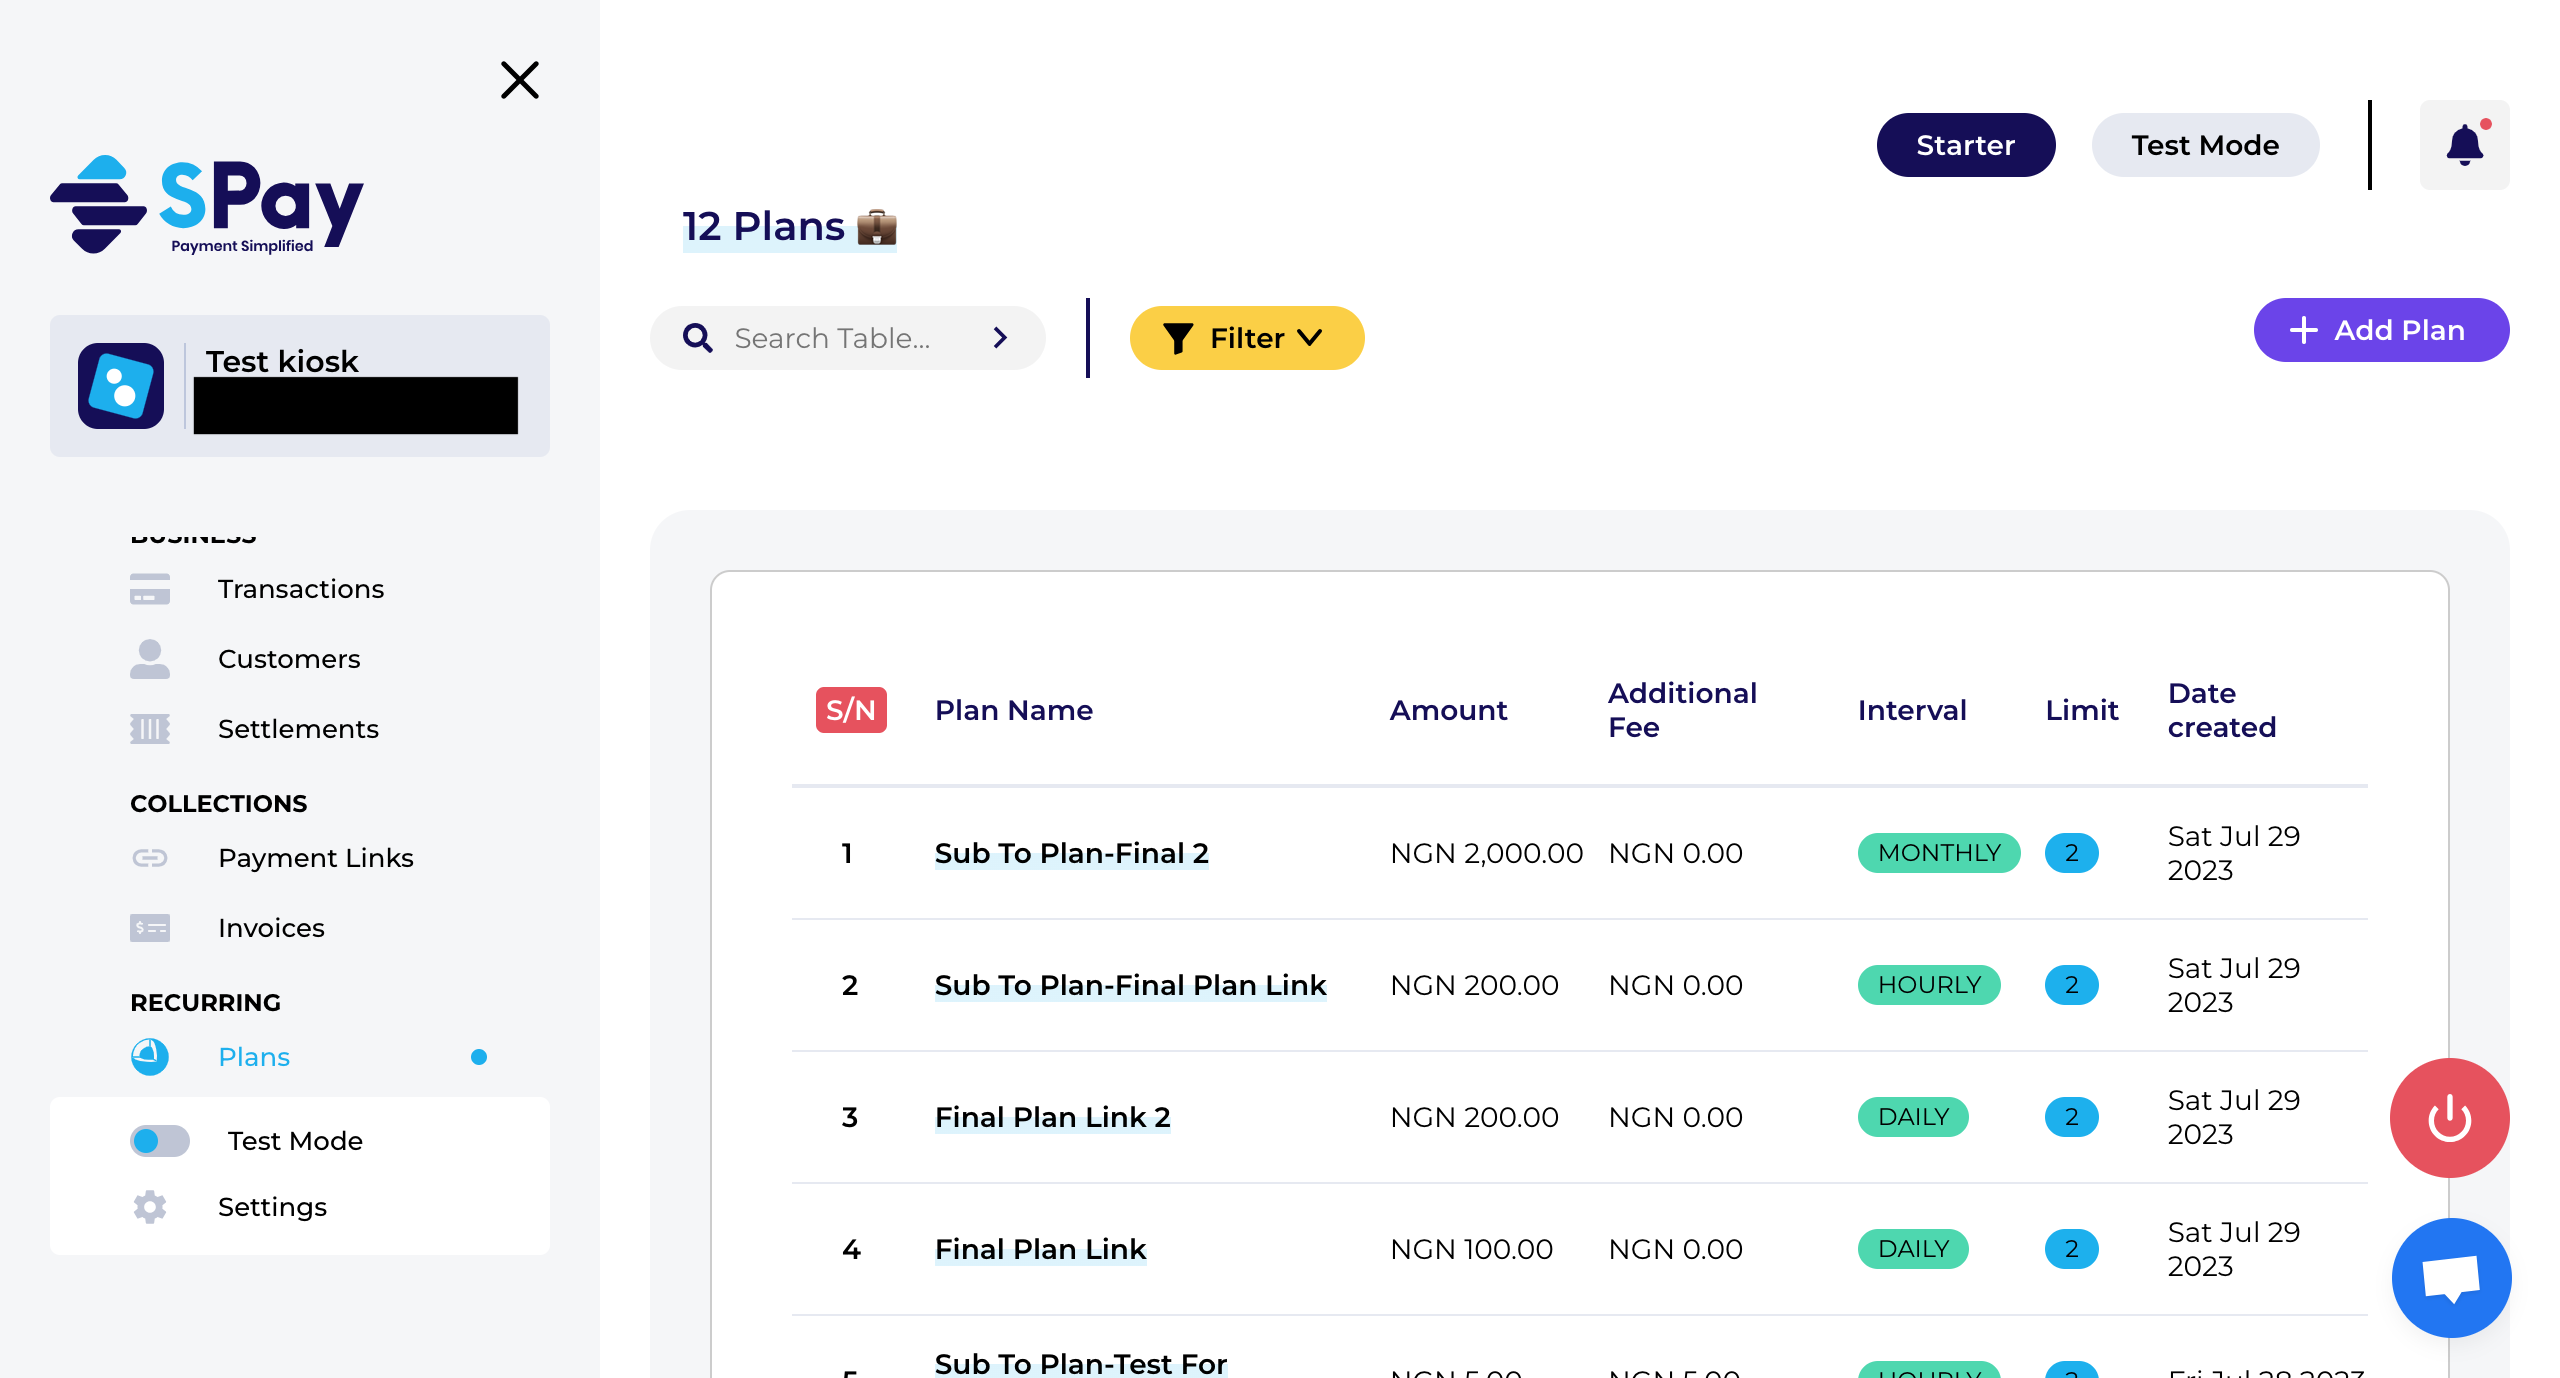
Fig 2.0
Create a Plan
When you click on add plan button, a form to fill will be displayed. Plan Name, Amount, Set Limit, Interval and Description are required.
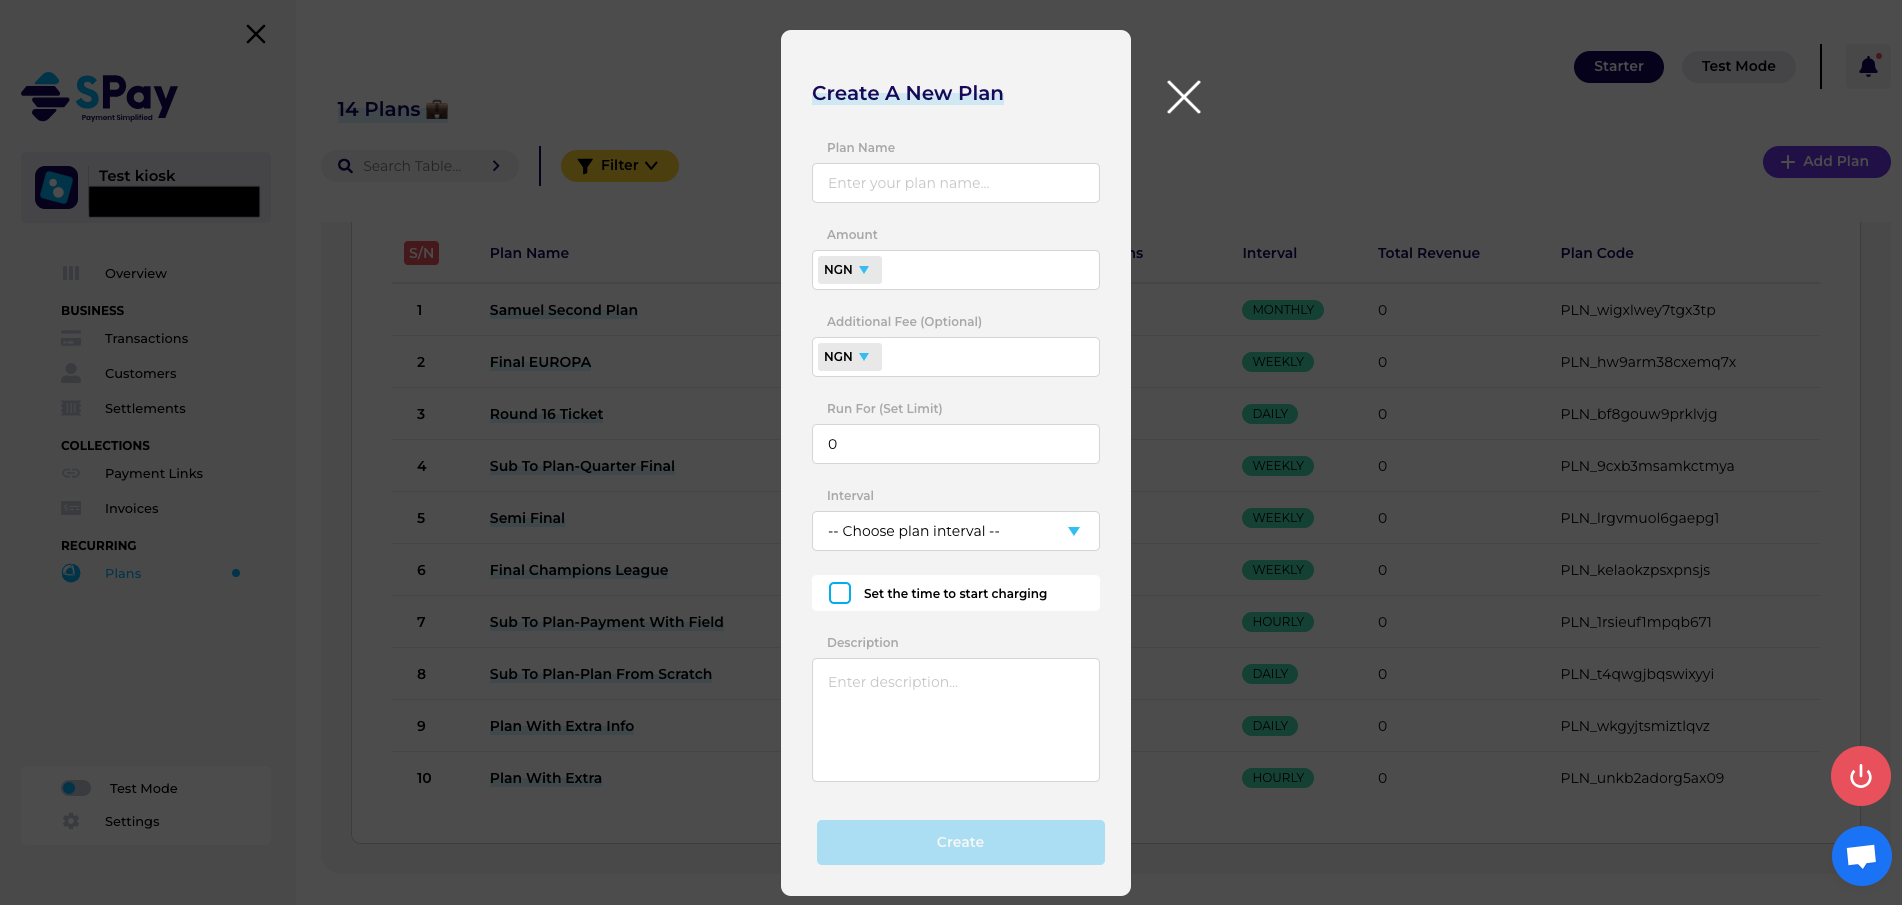
Fig 2.1
View Created Plan
When you have filled the form completely and you click on create, you will be redirected to see what you have created. This shows the details of what you have created and if you are not satisfied or you made a mistake, you can make correction(s) by clicking on edit plan.
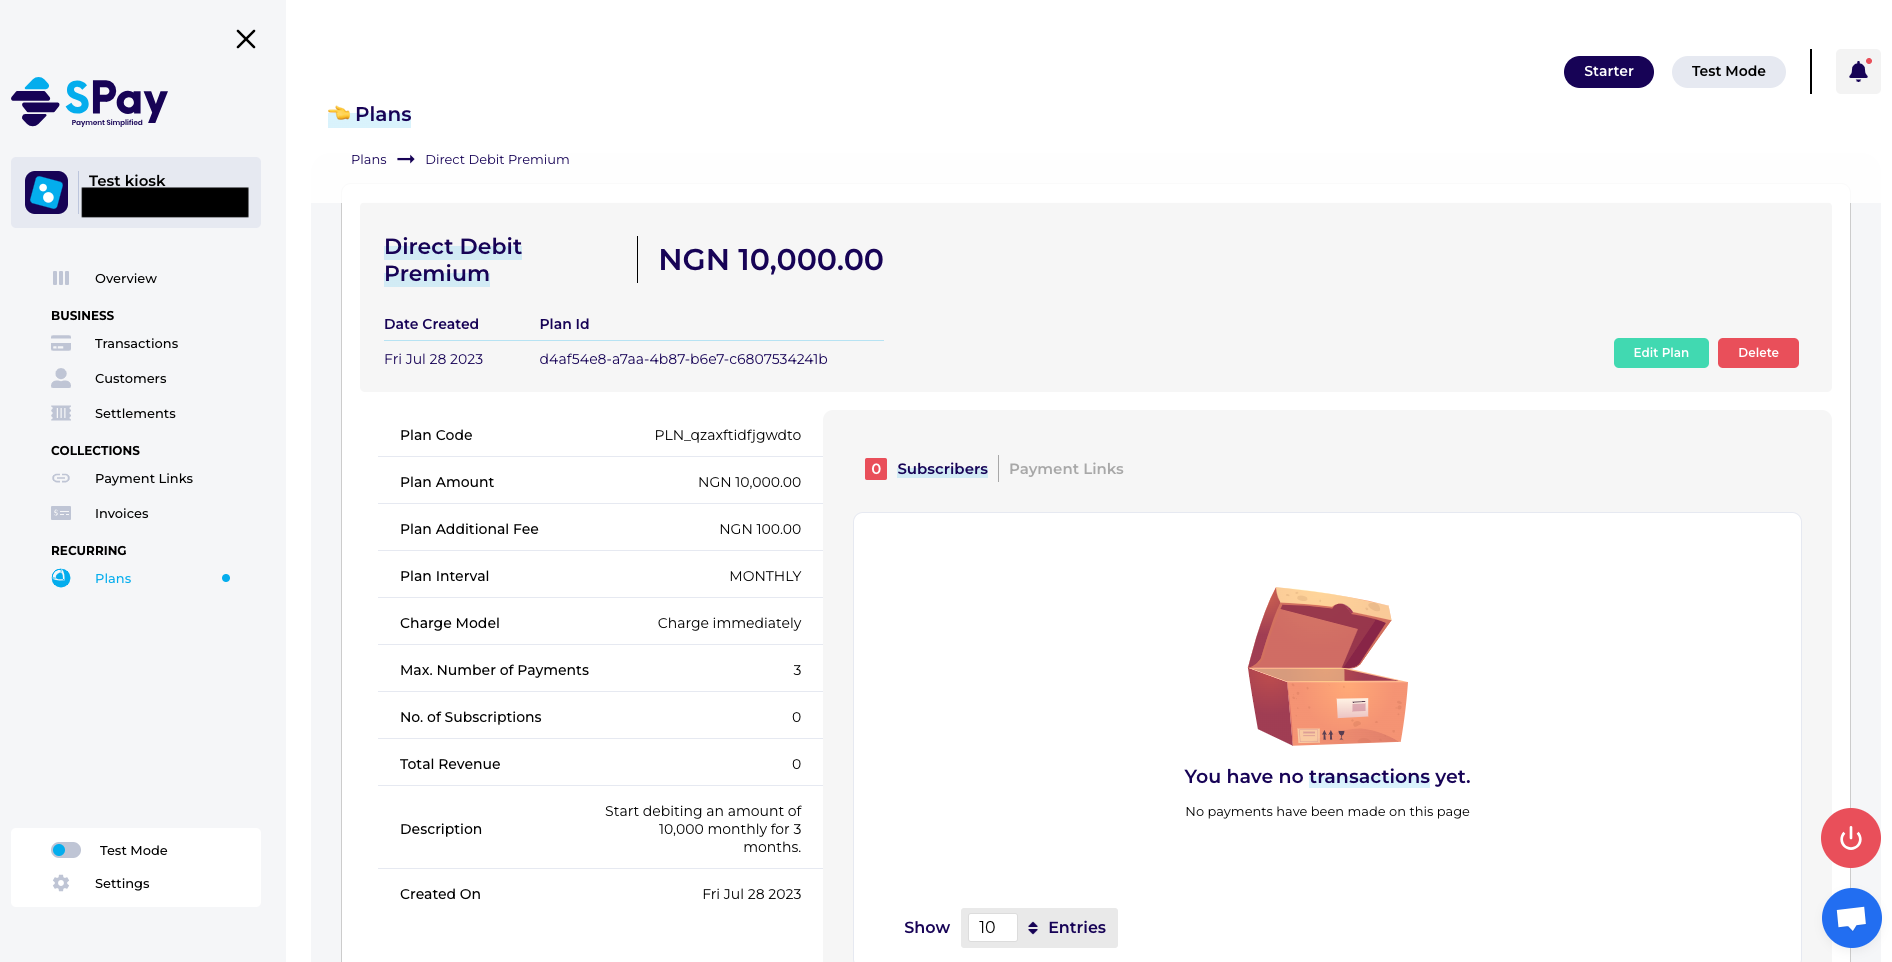
Fig 2.2
Create a subscription link
There are two ways to create a subscription link: You can either create them from an existing plan or by creating a new plan.
To create a link that a user can use to subscribe, visit spay payment link route and follow the steps below:
View Payment-links
When you have clicked on the payment-link route, you will see payment-links you have created or an empty page if you have not.
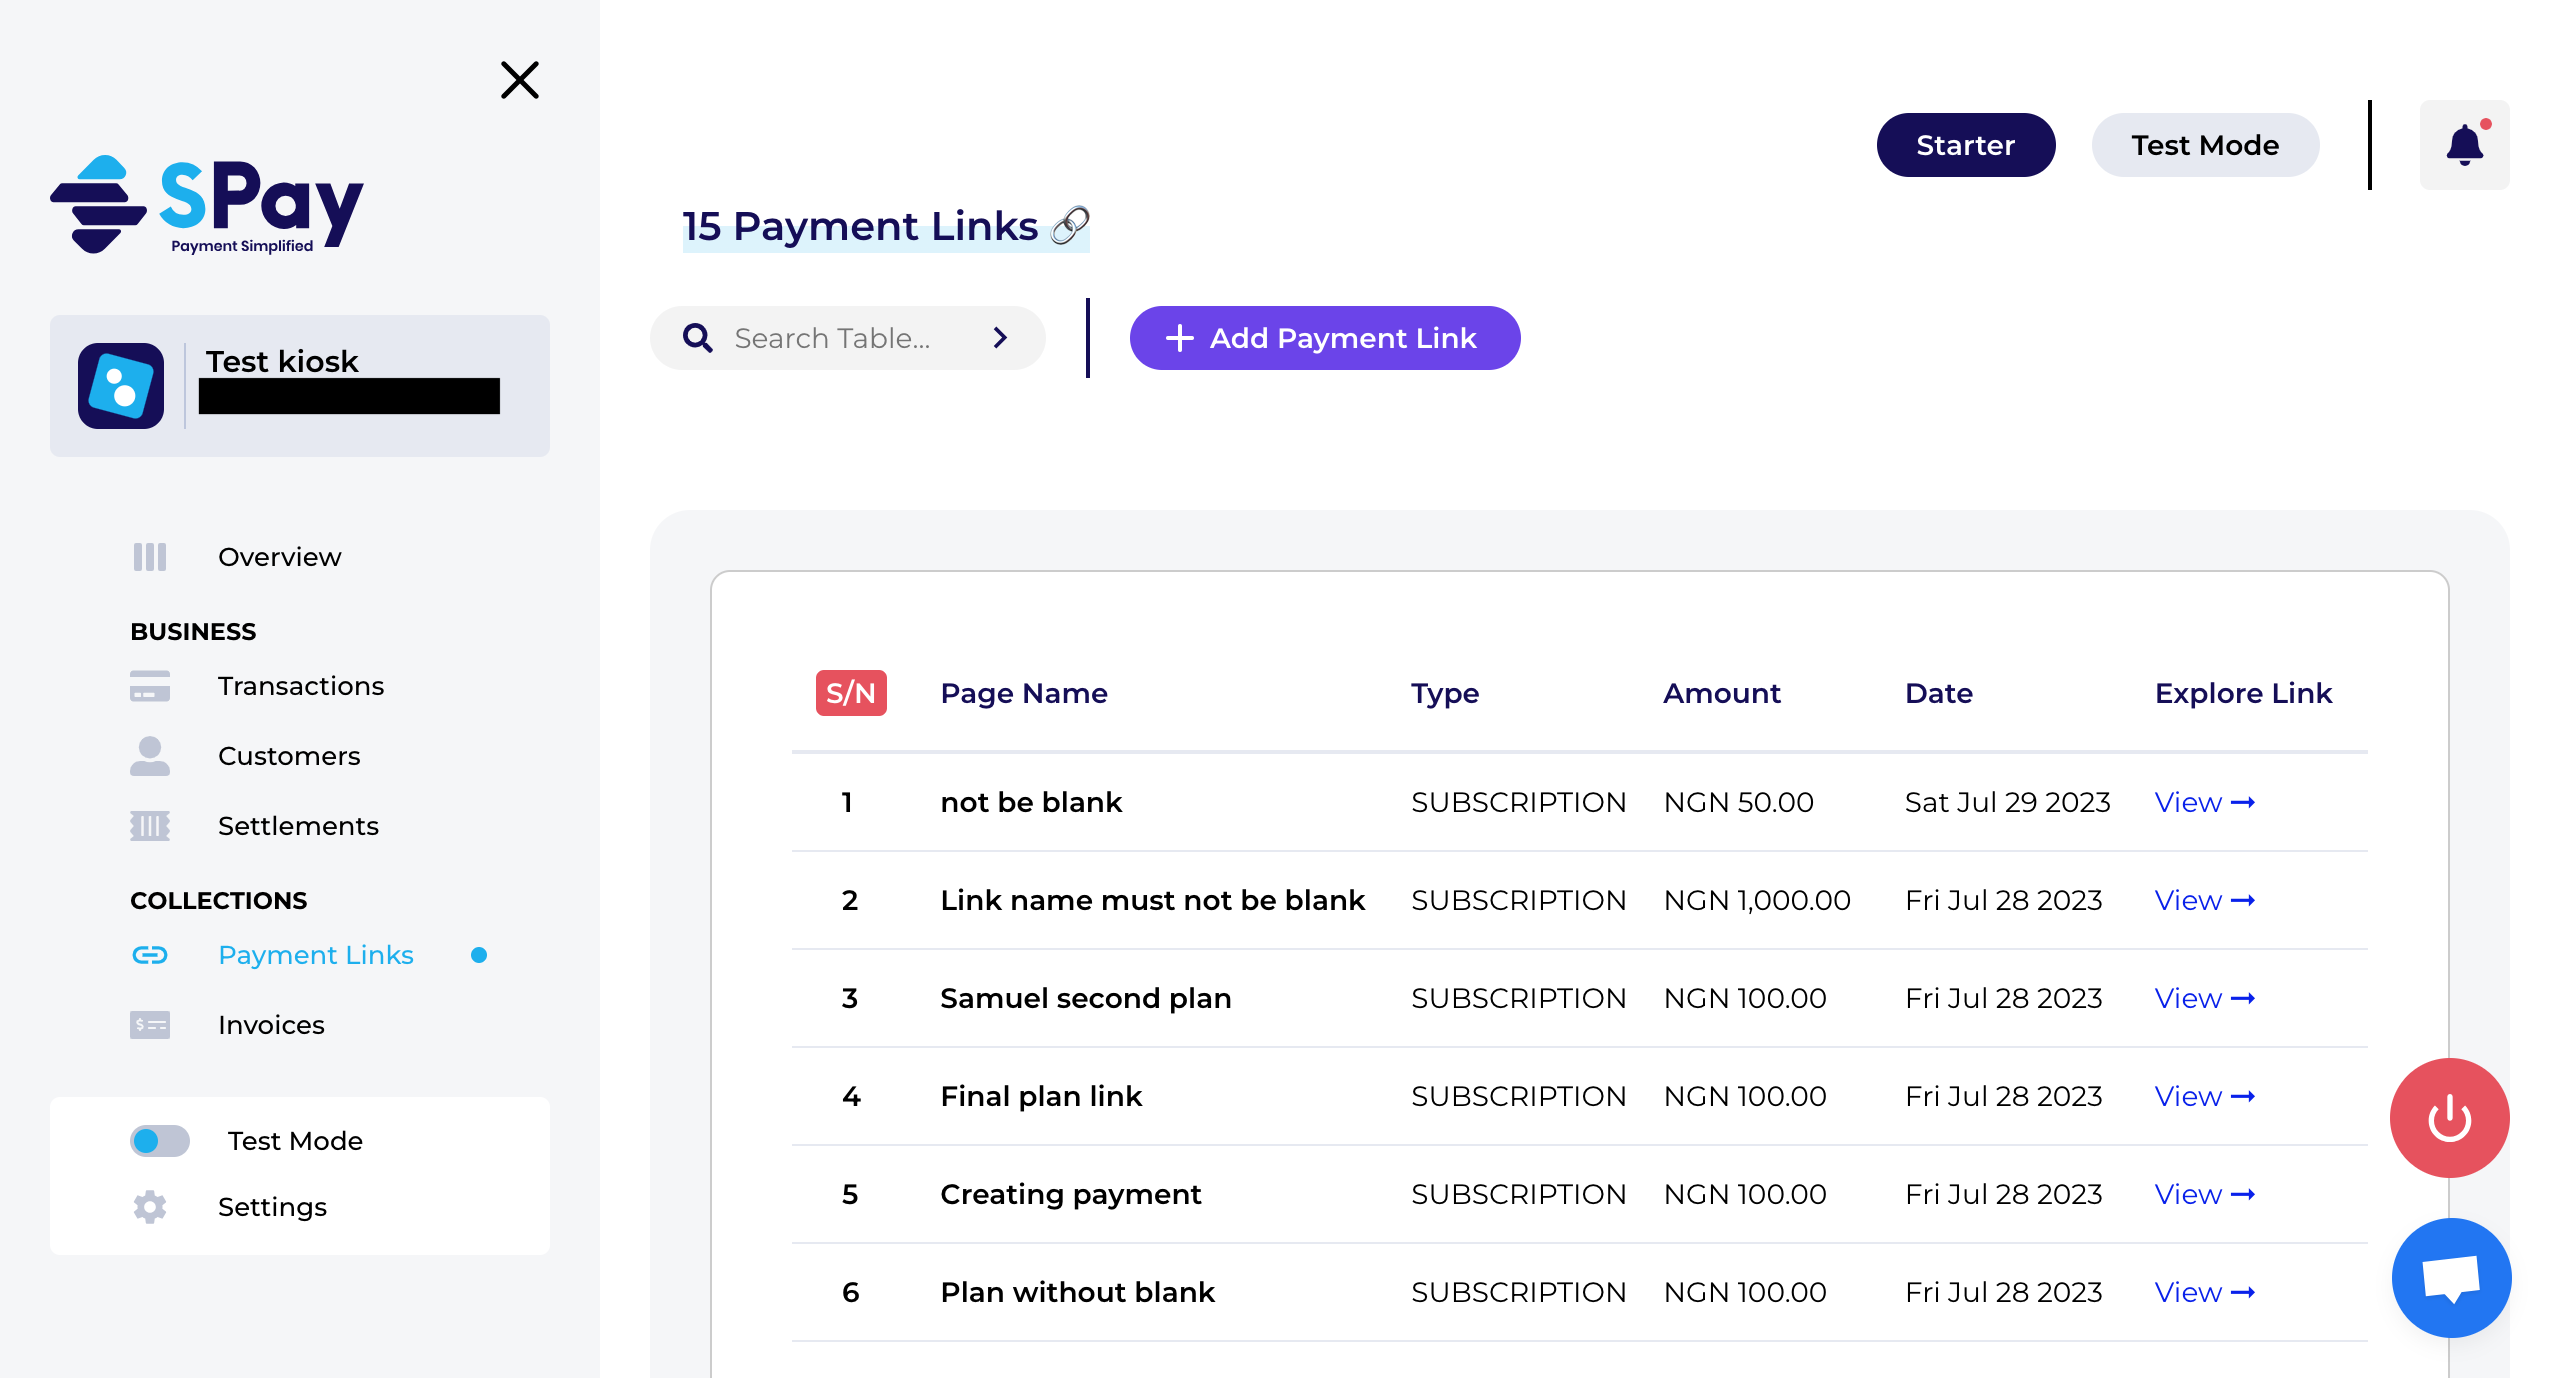
Fig 2.3
Add payment link
To create a subscription link, click on the add payment link button. You will be shown with two options to select from. Click on the subscription option.
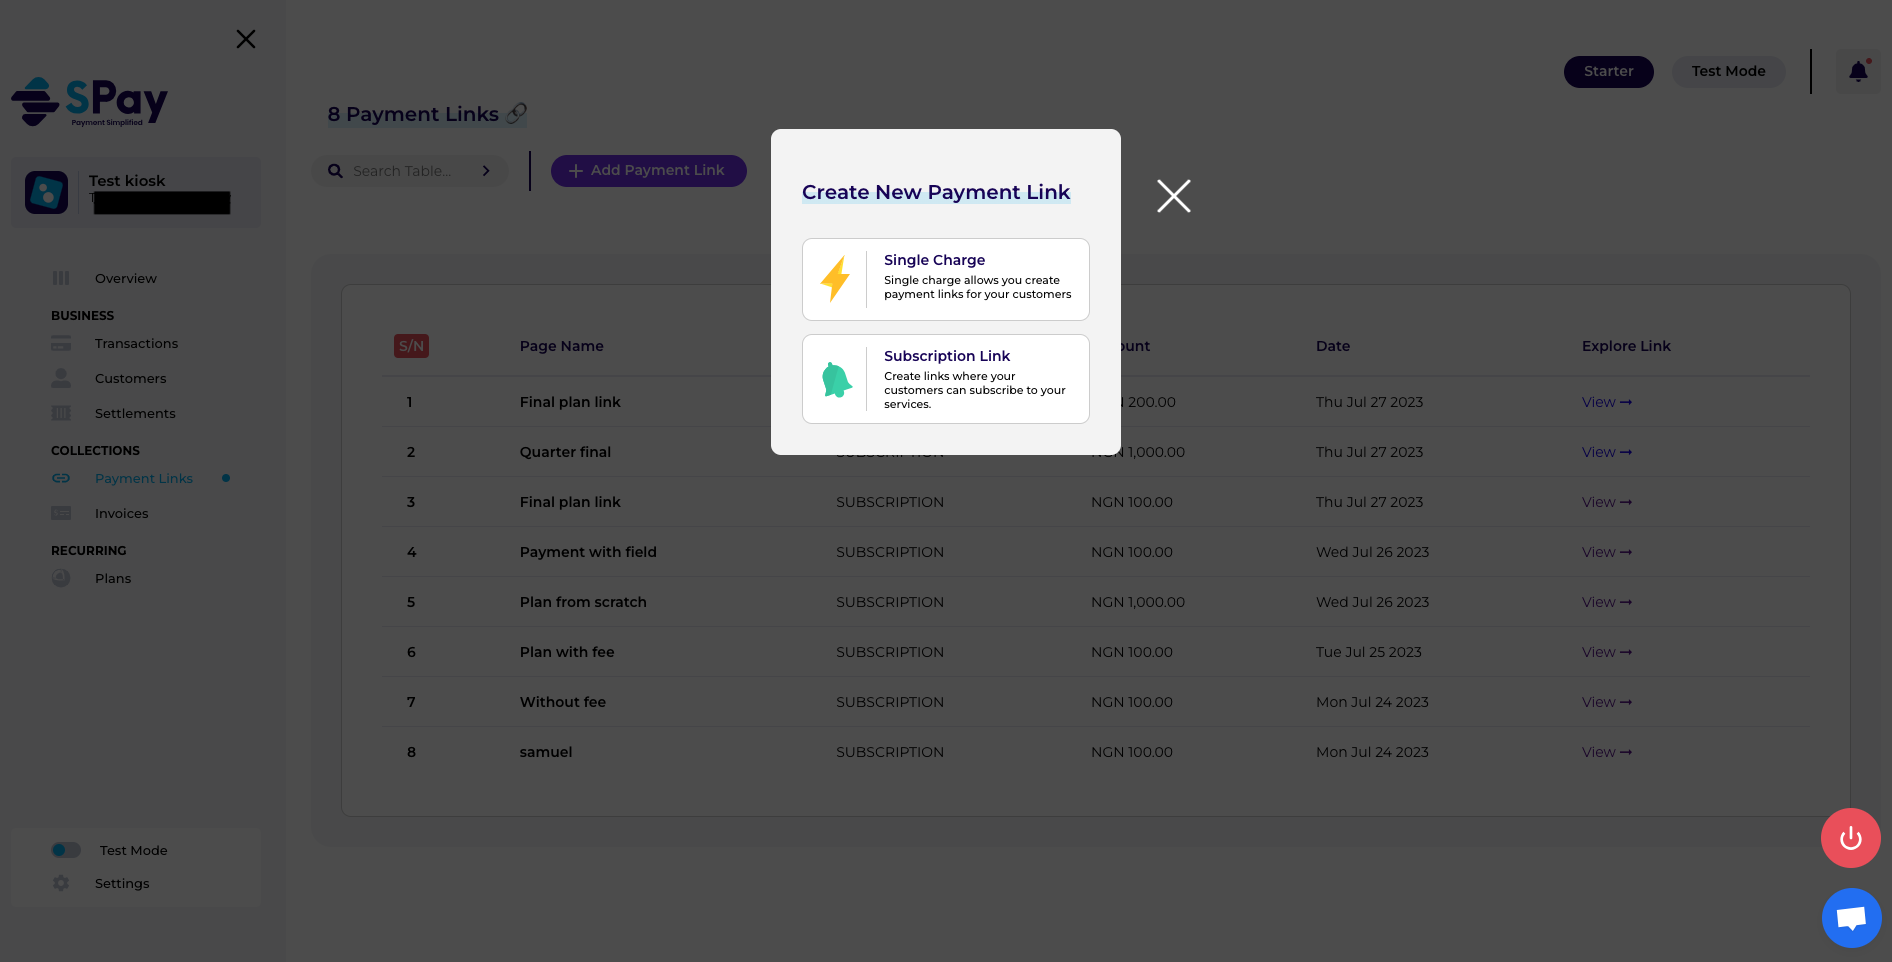
Fig 2.4
Subscription options
When you click on subscription option, you will be shown three options: create a new plan, use an existing plan or cancel.
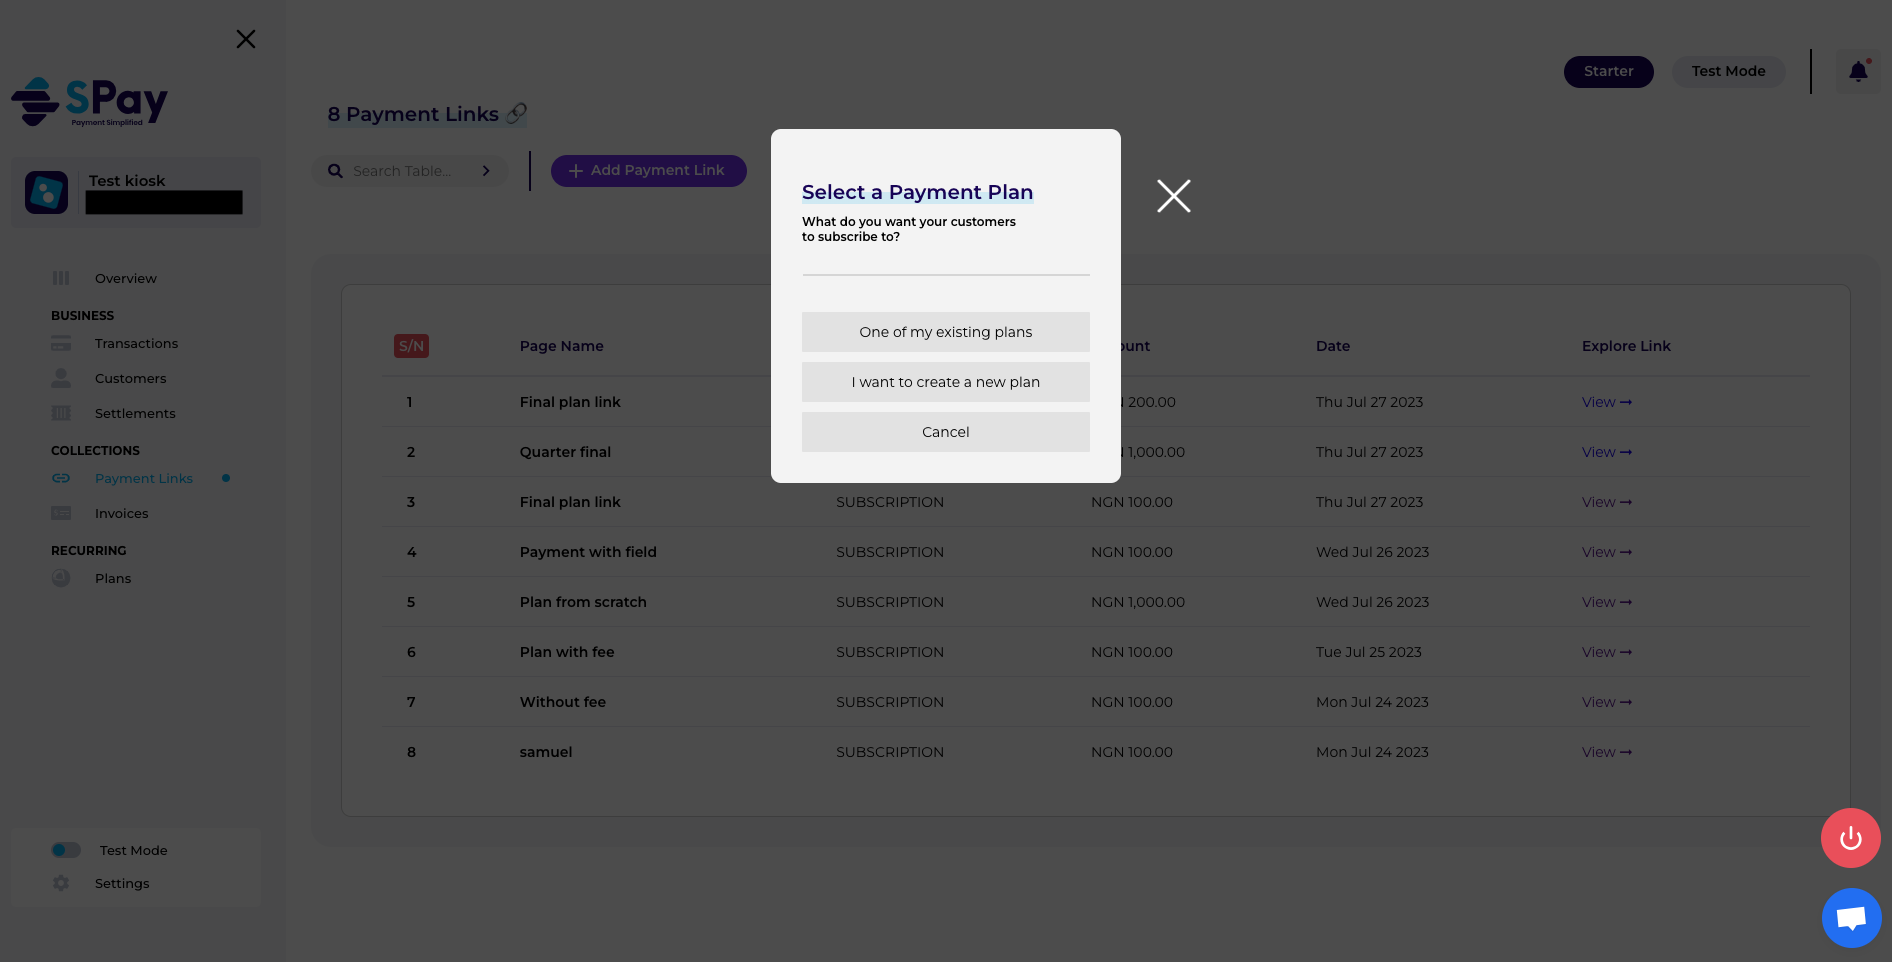
Fig 2.5
Create subscription link with existing plan
Once you select one of my existing plans, you will be shown a form to fill as in Fig 2.6. You will select from the plans you have created and give the link a name, which are required to create a subscription link. You can also fill in additional fields based on what you want. You can view them by clicking on show more.
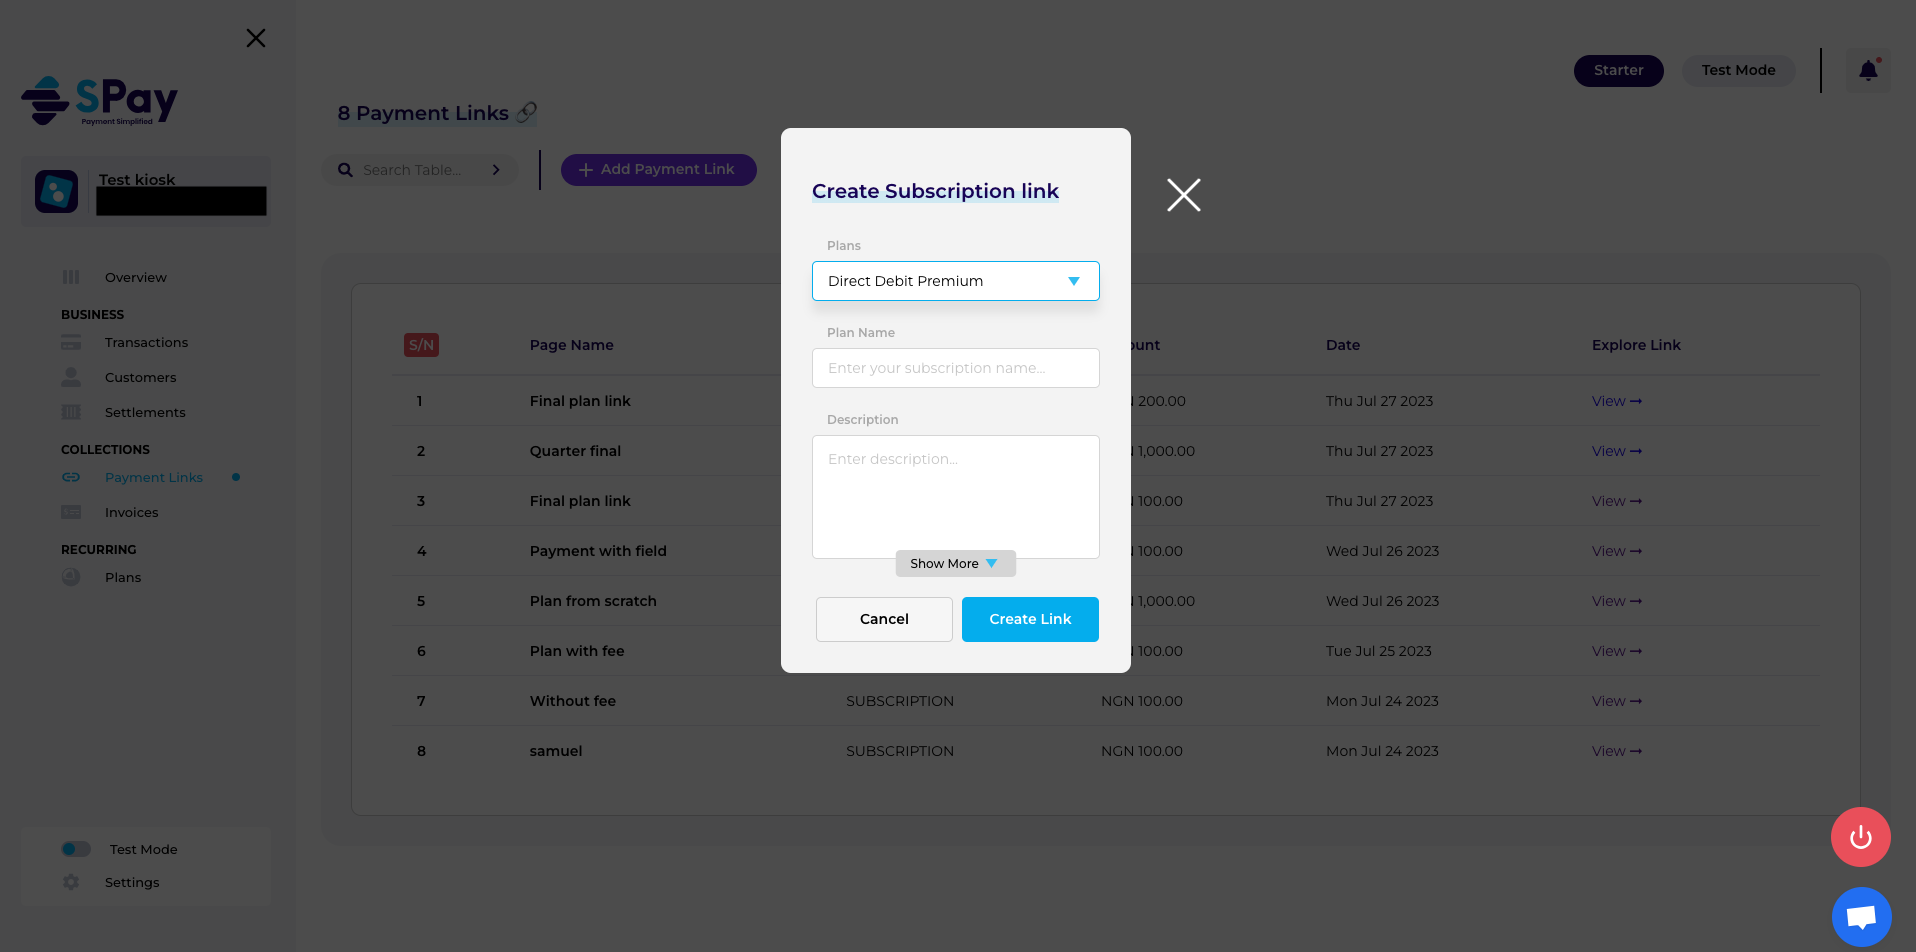
Fig 2.6
View created Payment-link details
When you fill in the form and click on create, you will be redirected to see what you have created. This page usually contains the link that you can copy and send to your customer to subscribe. You can edit, delete or un-publish this link.
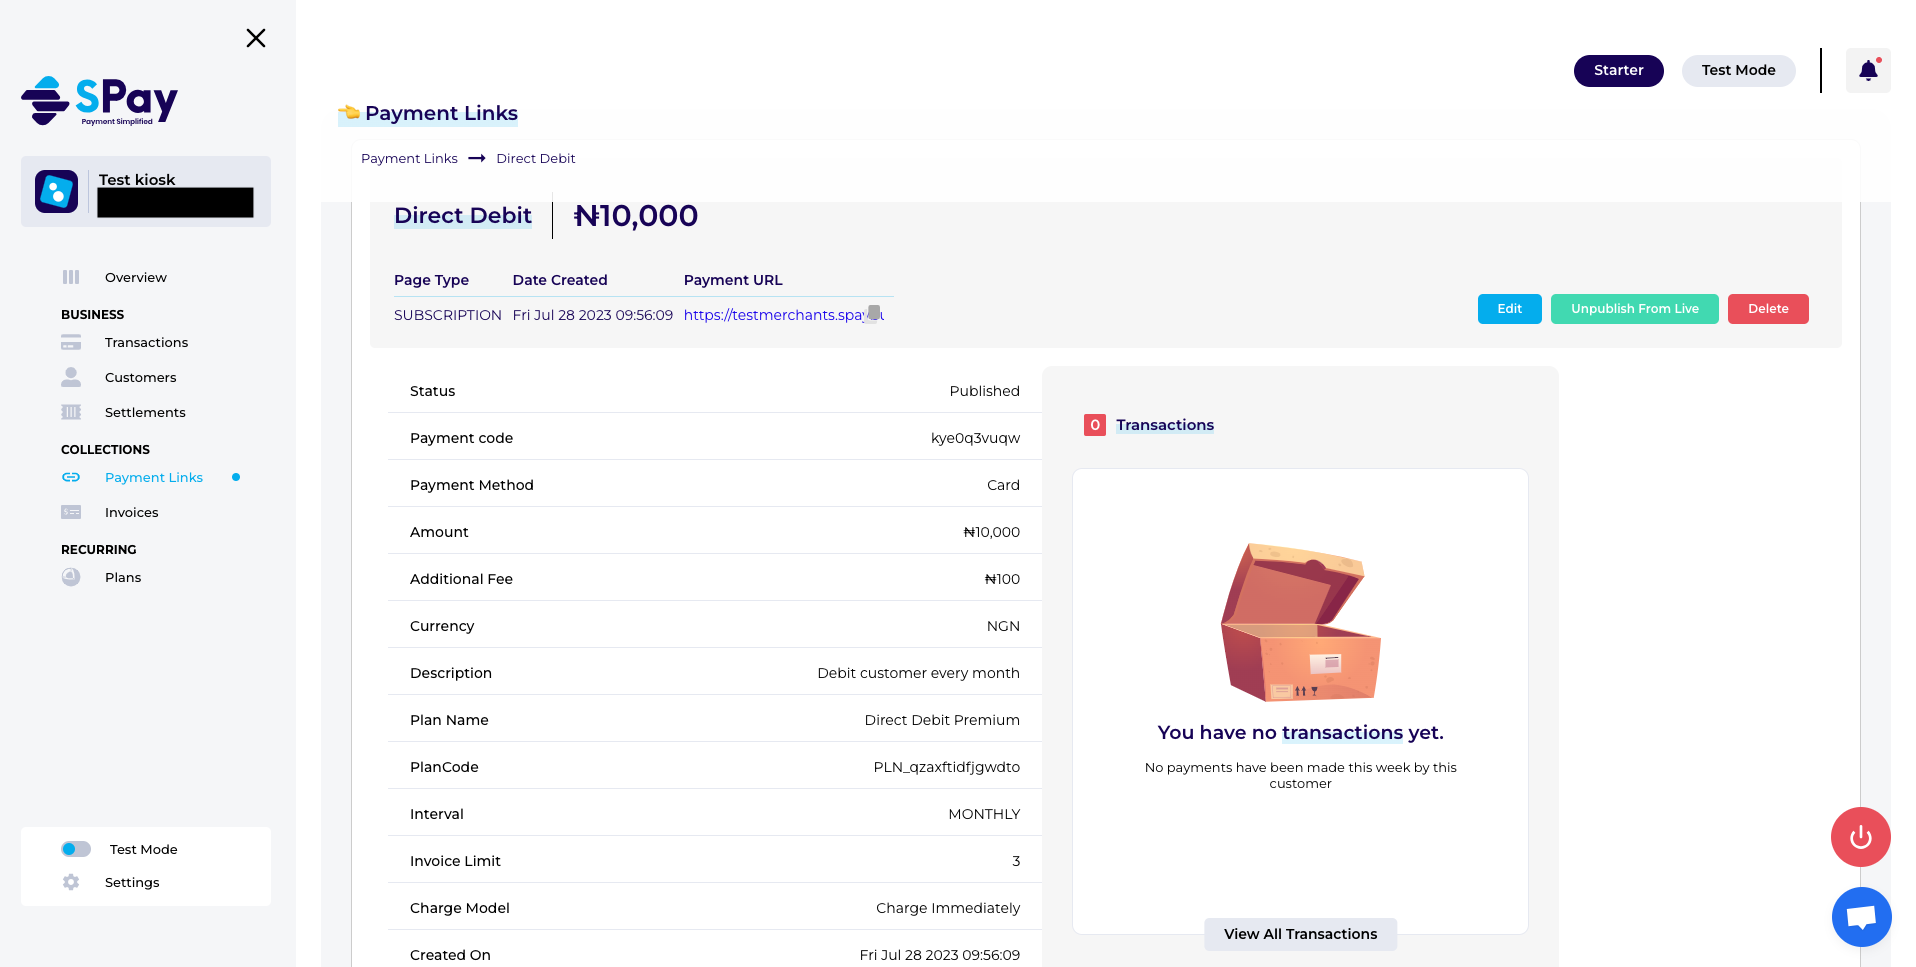
Fig 2.7
Create a subscription link by creating a plan
Likewise, you can create a subscription link from I want to create a new plan option in Fig 2.5. The below form, Fig 2.8, will be displayed and once it has been completely filled, you will be redirected to the Fig 2.7.
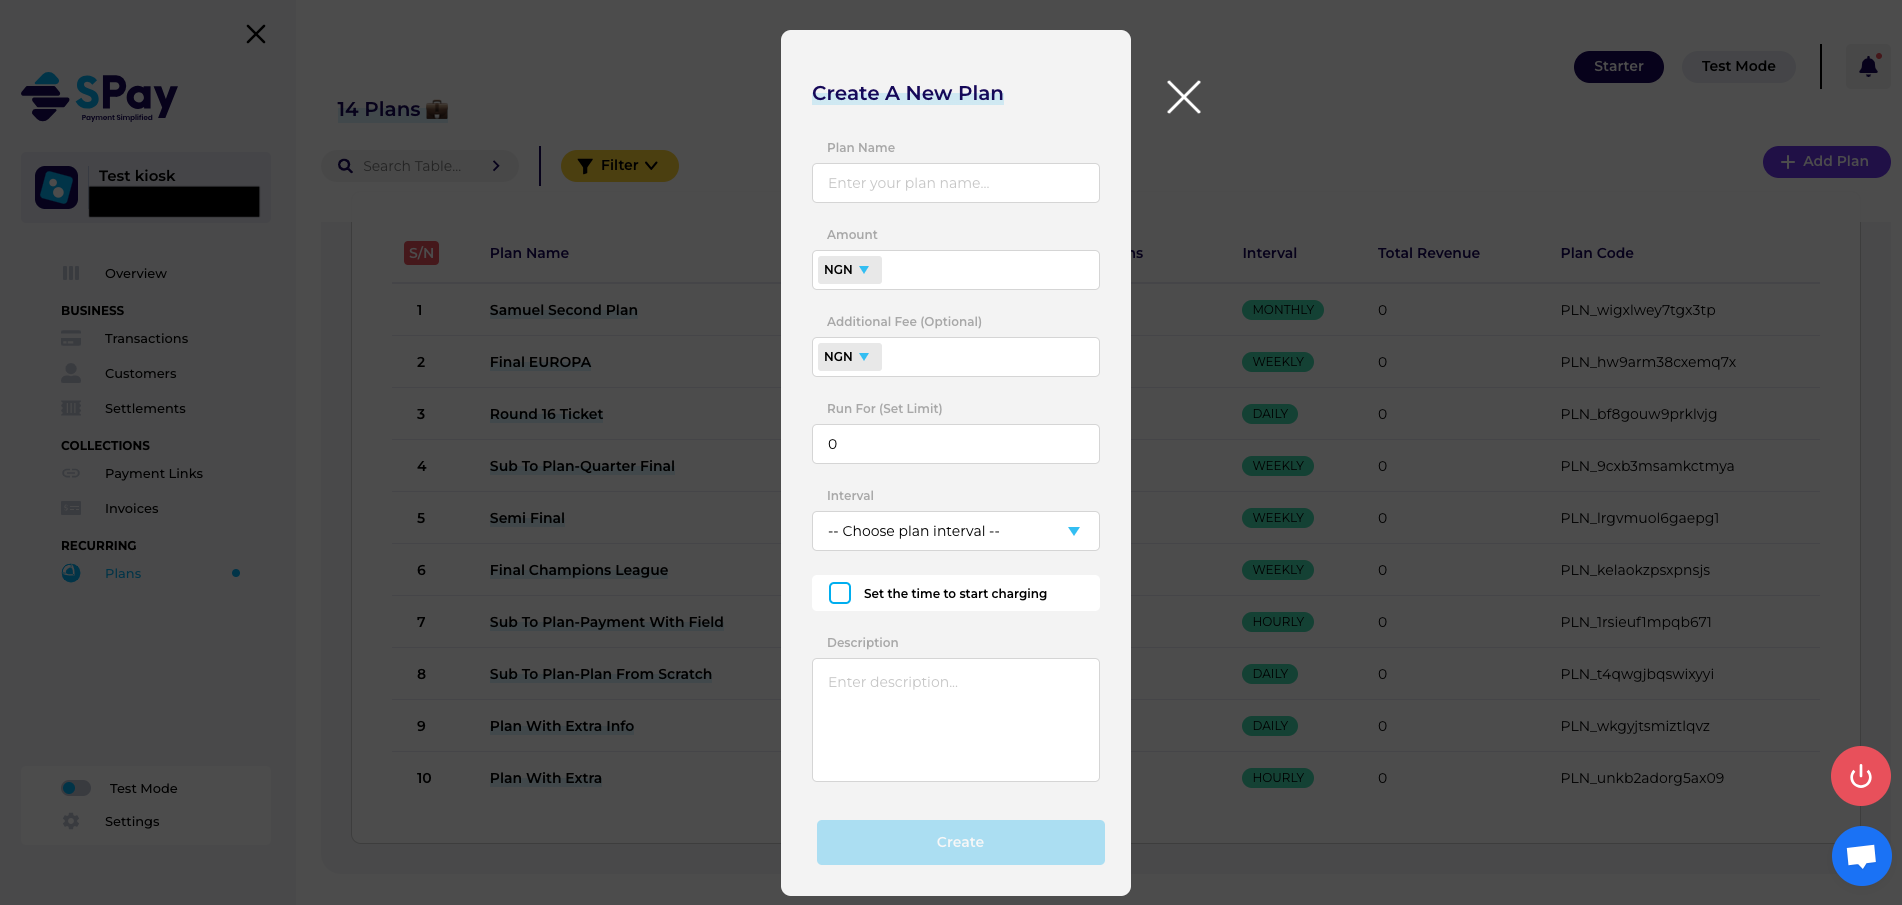
Fig 2.8
Created Payment Page
Once the link is clicked, your customers will be asked to fill in the page in Fig 9 below and once they have successfully made payment, you will receive a mail and their details will also reflect on your dashboard.
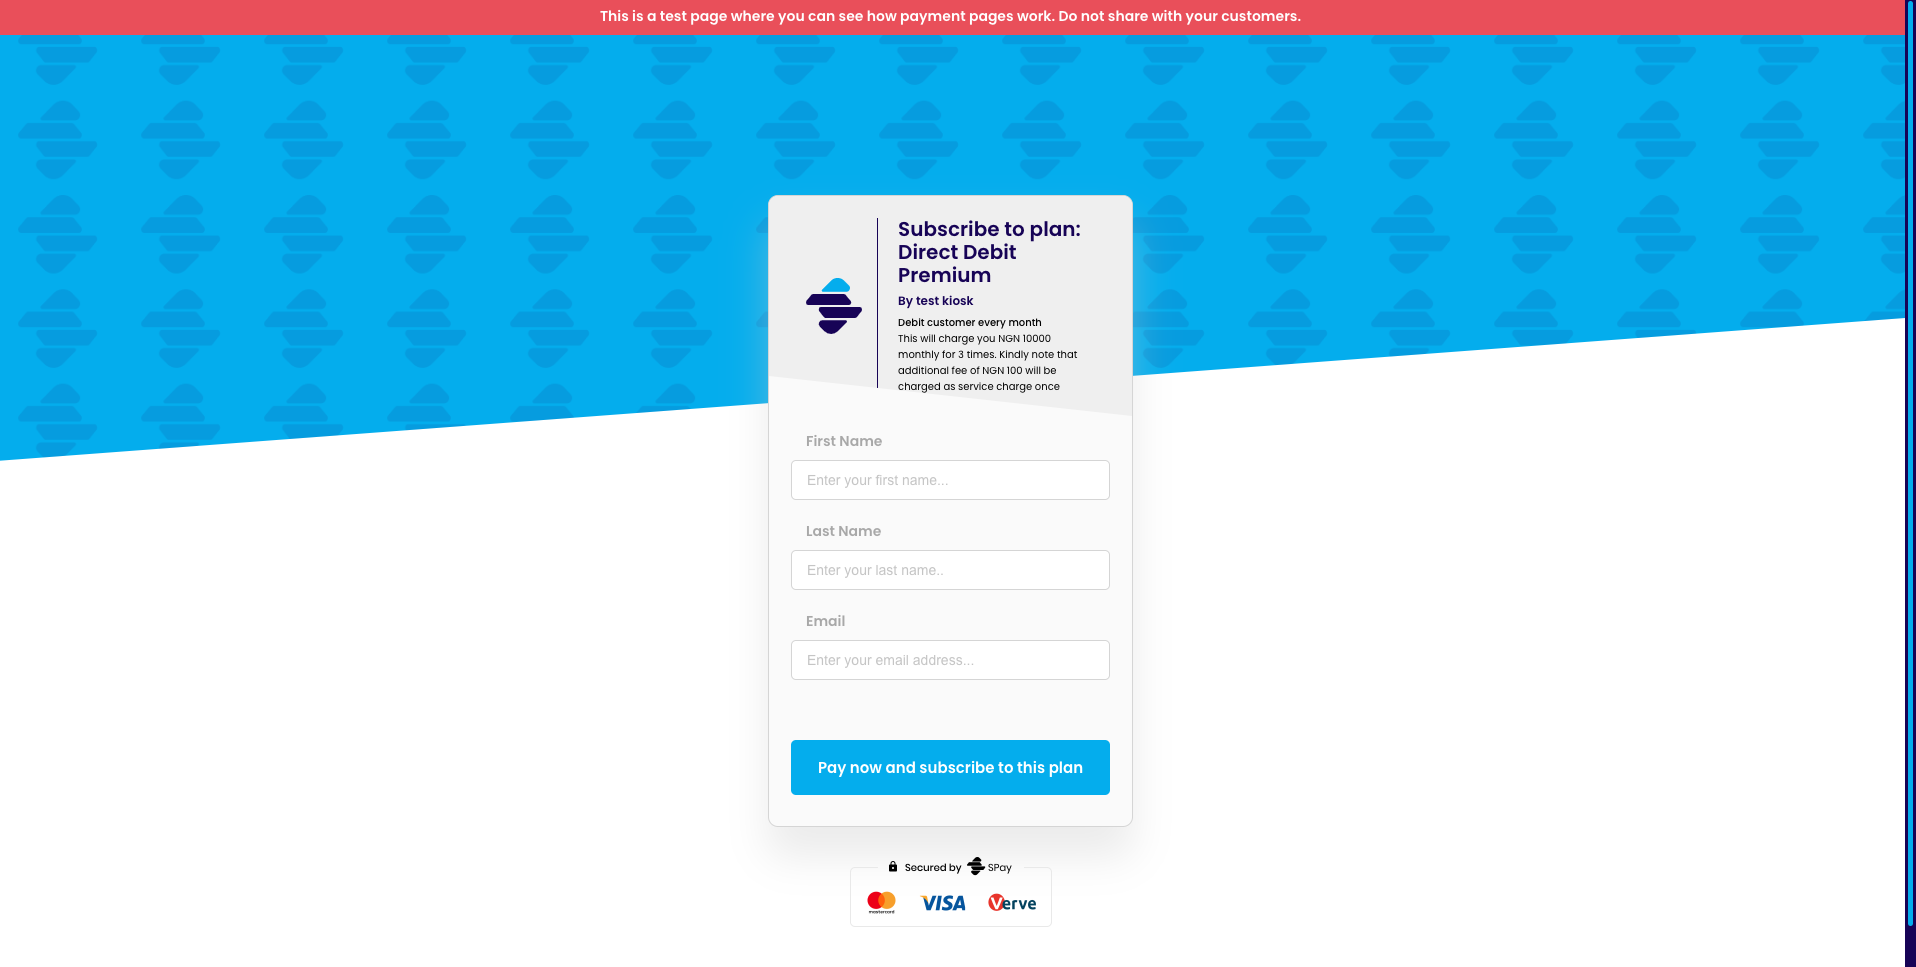
Fig 2.9
Updated over 2 years ago
